As I mentioned in my most recent spot on Paperclipping Roundtable, I have been working on some ginormous deco pieces that even Elf himself would be proud of! Here is the first in that series. These giant snowflakes are really simple to make. The whole project only took about 20 min. from start to finish. {I will share a photo of his in place next week when I post my Holiday tour of my home!} And don’t miss the details of the latest GIVEAWAY at the end of this post!
supplies
- foam core (got mine at Walmart for under $3)
- pattern
- sharp craft knife
- spray adhesive [Scotch Super 77 or other brand]
- glitter* [for this project I used German glass glitter since I know that I will be keeping it from year to year]
[click to continue…]
I was recently very fortunate to be chosen as a finalist to host a Pom Wonderful Party. The assignment was to create a pomegranate inspired dinner complete with Pom inspired decor! To read the entire recap, simply visit my food blog. For instructions to create the handmade decor pieces, see below.
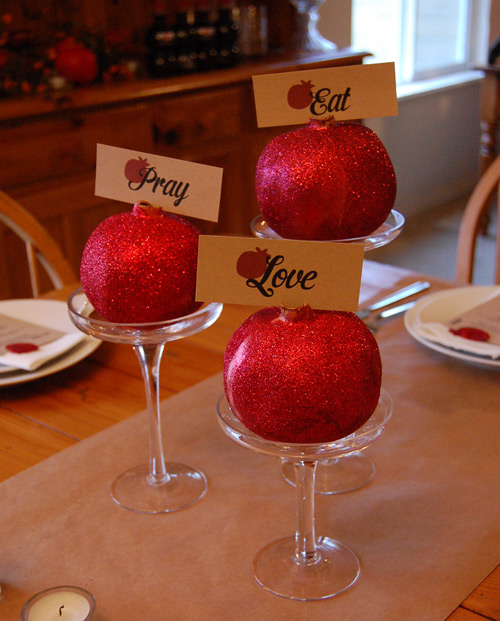
Eat-Pray-Love
I have never seen the movie or read the book, but these three words truly sum up my love of food, friends, and family. To create little grouping is both east and fun.
supplies
- white glue – Elmer’s school glue is perfect for this project
- foam brush
- art glitter – Martha Stewart choose two or three similar red/crimson shades
- cardstock – kraft (or white)
- template
- printer
- glass stands or other decorative base
1. working in sections, apply a thin layer of glue to the pomegranate, then sprinkle with glitter. shake off extra and repeat until the entire fruit is covered. Let dry completely – about an hour.
2. once dry, use a soft brush to remove any extra glitter than may not have stuck to the glue. set aside.
3. using the template, print the the words eat – pray – love onto cardstock and trim. (sized to 4×6)
4. cut two small slits into the crown of the fruit to hold the cards in place. set the fruits onto small glass stands.
Pom Menu
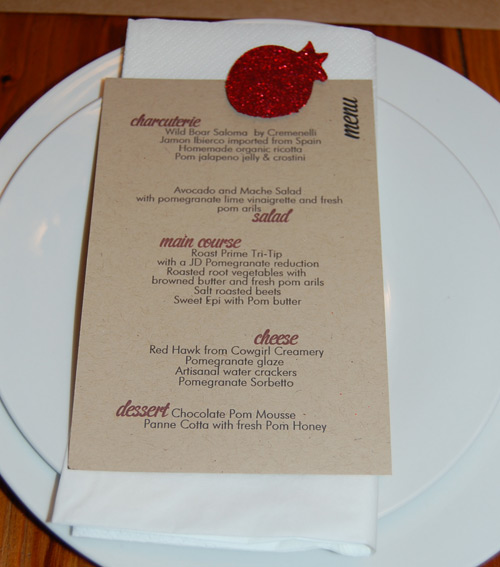
To keep the POM theme going, I created these individual menus. A detail that may be difficult to see in the photo is the glittered POM. It is adhered to the card using foam tape, giving it a little pop of dimension.
supplies
1. Using the template, cut out the little poms. to make this task go faster, I happened to use my Silhouette electronic cutter and a homemade cutter file. Of course if you don’t have a cutter you can just use the printable template and some good old fashioned scissors.
2. Once you have the POM cut out, simply brush with glue and apply glitter. Set aside to dry.
3. Print out your menu onto small cards. Mine are sized to 4×6 but you can do what ever size you prefer.
4. Adhere the little POMS to the top of each card using a little bit of foam tape.
Apothecary Jars and Bowls
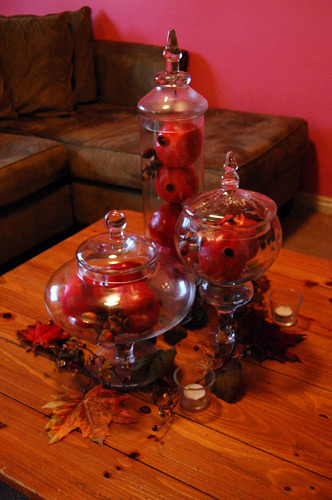
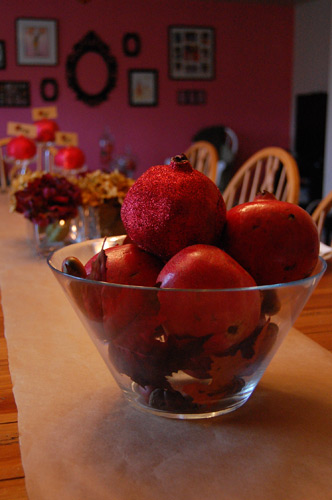
A super fast and easy centerpiece! Just fill some apothecary jars with fresh POM and faux autumn leaves for an almost instant decor. The best part, you can eat the centerpiece after your event! For a little extra sparkle, try filling a simple glass bowl with the fresh fruit topped with just a single glittered POM.

I love to take journaling cards and make them into an almost instant minibook. I am especially excited when the cards are as cute as these from Echo Park Paper.

One of my favorite things in the Summertime line, is the scallop border stickers. If you look closely.. the scallops are imperfect -they wonderfully un-even. Giving them a unique little touch of casual whimsy. The make the perfect edge treatment for my pages. But what to do about their unsightly sticky back?

You could cover the back with paper and trim around it.. but that is way too much work. lol So I look to the cure all in my crafting tool kit… GLITTER!

Just sprinkle your favorite glitter on the exposed sticky…

And you have a perfectly finished edge on BOTH sides of the page!

Swing by the Echo Park Paper Facebook Page for more fun ideas and to see the entire line.
To celebrate National Craft month.. I thought I would dust off some of my favorite videos from the Scrapbook Answers video vault! This video really brings back some fun memories. Leslie and I had a blast. And something you don’t see on the video was my out take after using the spray paint. I was completely overcome by the fumes and had to take a breather after getting a little loopy.
Even though this a few years old, the techniques are still great! Makes me want to dig out my old masks and paint.
***NOTE: I am uploading the videos to youtube since Flickr let me down. Here is the whole video. I will add a link to them all once they are all up. Thanks!