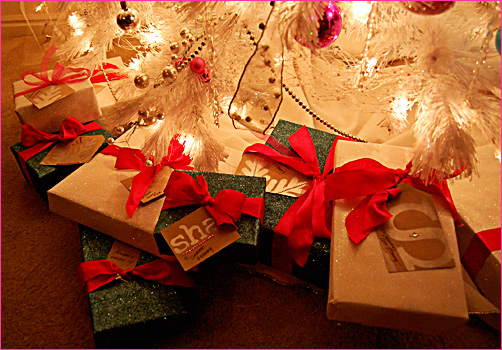
Anyone who knows me at all, knows that I am pretty relaxed when it comes to my crafts and projects. But there is ONE thing that I can be pretty hardcore about. GIFT WRAP. I LOVE beautifully wrapped gifts – I always have. My family has come to expect my yearly themed wrapping paper, ribbon, and coordinating tags. In fact, they even put up with my request to only wrap gifts in the approved papers, ribbons and tags. And because I really love the act of wrapping a gift, I like to wrap for most of the family.
This year, I decided to go with my sprayed kraft tags (with bits of bling), glittered wrapping paper *, and double faced satin ribbon in hot pink.
Some of my gift wrapping tips…
- Have a central location with all the supplies close at hand.
- Some of my wrapping must haves include the scotch wrapping paper cutter and pre-cut tape strips. I usually dont like little specialized gadgets, but the this cutter really is a time saver. And for specialty wrapping like foils, glitter, and f locking – it makes clean cuts every time.
- Create tags ahead of time. This year I had variations on each tag – some had names, others initials, snowflakes, ornaments etc.
- Stickers are awesome – to mix things up, you can also forgo the tag all together and use letter stickers to spell out your recipients name directly on the package!
A word about glittered paper
When I saw this glittered paper at the store, I instantly fell in love. So I picked up bunch of rolls and happily brought them home to adorn this years bounty. Well, when I started wrapping the gifts, I realized that this was some ADVANCED wrapping paper. Because the entire surface is glittered, regular tape, even packing tape does not stick to it! Each roll came with a few pieces of heavy duty double stick tape. (it was crap and didn’t do the job) What finally worked was my Super Tape. So to keep my kids from going crazy trying to use this “advanced wrapping paper”, I also picked up a couple rolls of beautiful but much easier to use regular wrap.
WINNERS CIRCLE
Lets pick our first German Glass glitter winner shall we?
send your mailing address and phone number to ana@anacabrera.net to claim your prize! The winner of the 2nd glass glitter assortment will be announced Monday. Leave a comment for another entry to win!
Our little house tour and giant candy tutorial has to be pushed to later this week, but I promise to post it this weekend. In the meantime – enjoy one of my favorite homemade ornaments to create!
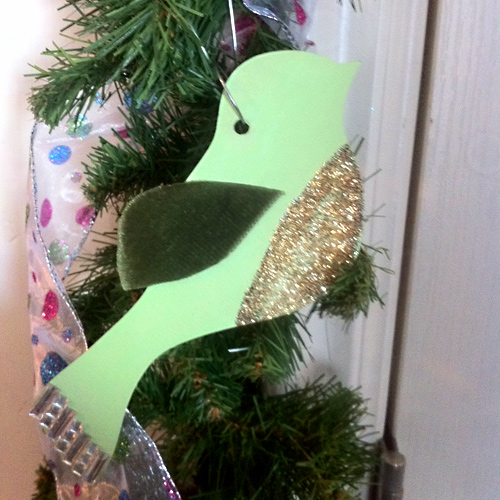
supplies
- chipboard bird blank (this is from maya road)
- paint
- glitter (german glass glitter)
- glue
- bits of ribbon, old book pages, jewels
1. begin by painting the chipboard and allow to dry. you can also start with cardstock, but be sure to layer a couple sheets together to make it more sturdy.
2. brush on glue and glitter the bird’s crest and and beak.
3. add jewels or more glitter to the tail, and cut a simple wing from book paper or ribbon.
NOTE: For these birds I love to use the true german glass glitter. As the birds age the glitter gets a beautiful patina. And when hung in your tree, the surrounding lights will shimmer beautifully!
GIVEAWAY ALERT
EVEN MORE genuine german glass glitter is up for grabs! Leave a comment and you will be entered to win one of TWO samplers. Winners announced this weekend.
Along with my giant snowflakes, I figured I needed some smaller snowflake cousins to fill in the little spaces here and there. So here are two more simple snowflakes. I used my Silhouette to cut out the snowflakes, however, you could use the pattern from the giant snowflake tuturial and just shrink it down to suit the size you need.
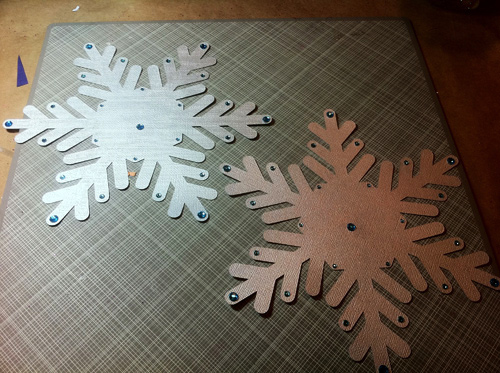
First up is a simple silver jeweled snowflake. I cut the snowflakes from white cardstock and spayed them silver. This is was very easy and much more cost effective than using silver paper. And although the photo doesn’t do it justice, they are really shiny and sparkly. I added little accent jewels in a nice blue as well. For this project I just used the acrylic sticky back jewels since they are thinner weight than the foam core and have a greater chance of now making it to next year.
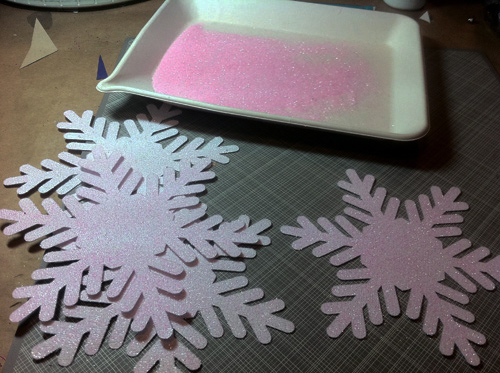
And of course, I had to do more glittered snowflakes! These are once again cut from white cardstock and glittered with really light pink Martha Stewart glitter. Since these are made from cardstock - I suggest using spray adhesive rather than liquid glue to ensure the paper did not warp and wrinkle. It also make glittering all these snowflakes a really quick and easy job.
GIVEAWAY ALERT
Don’t forget to leave a comment for another chance to win a german glass glitter prize package worth over $50! The winner will be announced Thursday when I give my holiday house tour! Be sure to come back tomorrow to learn how to make some fun candy inspired ornaments and decor that even Dr. Seuss would love.

As I mentioned in my most recent spot on Paperclipping Roundtable, I have been working on some ginormous deco pieces that even Elf himself would be proud of! Here is the first in that series. These giant snowflakes are really simple to make. The whole project only took about 20 min. from start to finish. {I will share a photo of his in place next week when I post my Holiday tour of my home!} And don’t miss the details of the latest GIVEAWAY at the end of this post!
supplies
- foam core (got mine at Walmart for under $3)
- pattern
- sharp craft knife
- spray adhesive [Scotch Super 77 or other brand]
- glitter* [for this project I used German glass glitter since I know that I will be keeping it from year to year]
[click to continue…]

aka: Fun with Fumes. Ok, I know what you are thinking. There is a part of you that wants to say… “you are nuts. there is no way I am spray painting my Christmas tags and decor.” But hold off on your judgement. These tags were a bit of a happy accident. While cutting out snowflakes (to later be glittered) I thought it would be fun to use the negative space for something. And what I discovered is a fun, easy, and FAST way to create a whole bunch of tags and cards. I hope you will give it a try.
you will need
- cardstock (I used KRAFT and WHITE)
- spray paint – preferably for paper. (I use Krylon Paper Finishes in Silver)
- stick on jewels (I usually am totally opposed to acrylic jewels, but for tags, they are perfect and inexpensive)
- ribbon – (I am using 1.5″ double faced satin and 3/4″ sheer organza)
For each shape, start by cutting your cardstock to the desired shape. For “tag” shape, I simple handcut. Notice on the “S” tag how I left one side uncut. The ornament shape was cut using my Silhouette. Of course, you could just cut one by hand or using another die cut system. What ever you prefer.

In a well ventilated area, use easy release painters tape to adhere the negative stencil to the paper. Personally I like to use a very large stencil for just a partial shape. Of course, this is your own preference. If you do not have negative stencils that you have made – there are lots of commercial stencils available for very cheap at most craft stores.
Spray the project. Paper paints dry almost immediately, so you can peel the tape away right away and just wait a few moments for it to dry.

Adhere the jewels and tie with ribbon. (experiment with different knots and ties)
The best part, the stencil is reusable, and it is easy to line up several tags or shapes to spray at once.
Be sure to leave a comment below for another entry to win those very cool glitter markers by Copic. (I am still working on getting a good photo of the project. A challenge since I am terrible photog…lol)
I have to admit, when getting ready for the holidays I always look to see what Martha Stewart has going on. After all, it was Martha who (along with my mom) inspired my love of cooking and decorating and crafting. Inspired by her felt corsage, I created these simple but super cute Hair Holly for my girls.

I have to admit, when getting ready for the holidays I always look to see what Martha Stewart has going on. After all, it was Martha who (along with my mom) inspired my love of cooking and decorating and crafting. Inspired by her felt corsage, I created these simple but super cute Hair Holly for my girls.
Creating it was very simple.
- Cut the individual leaves from wool felt.
- Using a sewing machine (or by hand if you prefer) add some contrasting stitches along the edges.
- Sew (or hot glue) the leaves together, gather at the center.
- Add a bow and a little ornament for an added festive touch.
Look for unbreakable or plastic ornaments when making for younger kids. Th glass ones can shatter pretty easily. I found mine in a tube at Target.
Be sure to leave a comment for your chance to win our first prize, a Martha Stewart Glitter sampler. Leave a comment below and one lucky winner will receive a finished bow from me to you! I will announce winners for this week’s giveaway Monday AM. So tell your friends. See you tomorrow!