The newly weds are on their way home and I think I have finally recovered from the wedding of the year. (at least in my house)
Join me next week for DIY WEDDING WEEK – April 4-8. Tutorials and how-to for creating simple decorations with stunning results. No wedding planned in the near future – no problem? Most of these projects are perfect for springtime decorating or any special party or event. There will also be giveaways each day… so be sure to “tune in” !
*photo credit: Cristi Rudger Bastian of Hiya Papaya

The wedding countdown is well underway… I am up to my eyeballs with paper goodies. These flowers are going to make fantastic centerpieces. Making them is fun, and I have them in a variety of flower types. My new eclips* has become a very key part of the process – taking all the work out of cutting the flowers.
To create a centerpiece, you will need to start by making the flower picks. To go with our homespun theme, I decided to keep the sticks bare, and use only white paper. Of course you can paint the sticks to match or coordinate with your colors. Printed papers with small patterns also look very cute. This tutorial covers the daisy, which is a double flower.
full instructions…

March is quite a month for me. I am putting together three birthdays, my daughter’s baptism, a bridal shower, a bachelorette party, and a DIY wedding. What better excuse to fulling immerse myself in National Craft month than all these fun events. So lets kick things off (finally) with Pink Craft Week.

We have all seen these fun puff balls (made popular by Martha Stewart) But try another take on them… string them into a garland for an easy puffy garland. To create a puff garland is easy. You will use the same technique as the larger one with just a couple simple adjustments.

[click to continue…]
Pantone’s Color of the Year is Honeysuckle 18-2120. Love it or hate it?

It goes without saying that I LOVE IT.Crafting in this color palette makes me happy! And It was nice to see so many fun scrapbook papers and embellishments are being released in this color family. I love it so much in fact, I decided to refresh my blog with the color.
House Beautiful’s annual color issue is all about PINK!

And it is totally inspiring. Even if the thought of pink walls makes you cringe, you have got to check out the issue. There are lots of surprising ways pink was used… that I think would be fun to pull into a scrapbook page or card. Of course the issue just makes me want to continue my quest to have a pink wall in every room of the house.
GIVEAWAY ALERT: Let me know what you think. Honeysuckle… pink… love it? hate it? One winner from each side… love and hate will get a fun prize package. The love its will get a pink gift package to brighten their day… and one “hate it” gal will get a black prize package. {who doesn’t like black} If you are neutral… you are in the running to win both! Winner announced Monday 2/28.
And join me the rest of the week for some “pretty in pink” inspired projects.
Valentines is NOT one of favorite holidays. Probably because, I have not had a Valentine for almost a decade. No matter… my little divas are always fun to shop and decorate for. And as a velentines treat to my readers, leave a comment on any of the posts this weekend and on Monday a lucky winner will get a fun CHA prize package including – Papers from Echo Park, Making Memories Bravissimo, and more!
 Hanging in our entrance hall are these big hearts. Each heart is a little umder 12″ and decorated in its own special way. Keep reading for a close up and instructions for each one. I am thinking about cutting some vinyl saying to go right above it…we’ll see.
[click to continue…]

Along with my giant snowflakes, I figured I needed some smaller snowflake cousins to fill in the little spaces here and there. So here are two more simple snowflakes. I used my Silhouette to cut out the snowflakes, however, you could use the pattern from the giant snowflake tuturial and just shrink it down to suit the size you need.
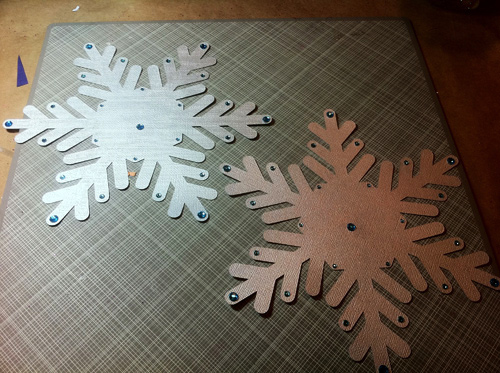
First up is a simple silver jeweled snowflake. I cut the snowflakes from white cardstock and spayed them silver. This is was very easy and much more cost effective than using silver paper. And although the photo doesn’t do it justice, they are really shiny and sparkly. I added little accent jewels in a nice blue as well. For this project I just used the acrylic sticky back jewels since they are thinner weight than the foam core and have a greater chance of now making it to next year.
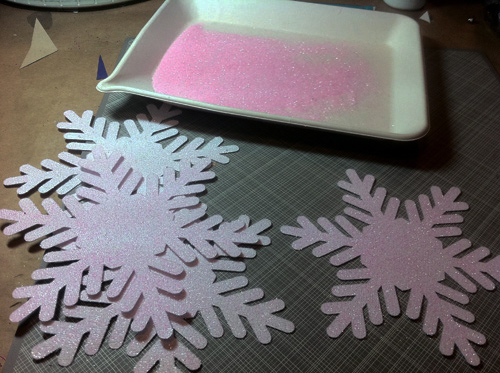
And of course, I had to do more glittered snowflakes! These are once again cut from white cardstock and glittered with really light pink Martha Stewart glitter. Since these are made from cardstock - I suggest using spray adhesive rather than liquid glue to ensure the paper did not warp and wrinkle. It also make glittering all these snowflakes a really quick and easy job.
GIVEAWAY ALERT
Don’t forget to leave a comment for another chance to win a german glass glitter prize package worth over $50! The winner will be announced Thursday when I give my holiday house tour! Be sure to come back tomorrow to learn how to make some fun candy inspired ornaments and decor that even Dr. Seuss would love.